Showing posts with label wreath. Show all posts

Tuesday, September 3, 2013

A Cow Head in my Kitchen


I've been noticing lots of ceramic taxidermy hanging around some pretty popular blogs lately.  I'm not a fan of the real thing {taxidermy that is} but these ceramic fellas are pretty cute.  Hang a nice little piece of greenery around there neck and "Wa La"...instant cuteness!

Wednesday, January 16, 2013

Everyone Needs a Lima Bean Wreath

So what's a girl to do with a hankering for a new winter wreath and an excess of lima beans?  I guess any normal person would let the lima beans cook all day while making a fantastic wintery wreath but I don't guess I'm what you'd call normal... 

Although I do enjoy a good ole pot of limas!


Instead.... I decided to make me a wreath covered in limas...not cooked, of course.


It's funny, moving from the country to the city is way different.  I say country, it was country to me, even though we were nestled nicely on the side of a mountain next to the river.  And especially now that we have moved... but, "living in exclusion" may be a better term for the old homeplace.  

I mean, I still decorated and made lots of projects in the old house, there was just no one to see them.  Except for those of you out there who enjoy reading and looking at the pictures on this blog.  

Let me just be blunt with you... in the city, the pressures on!  To have a nice yard, a unique wreath, fancy-shmancy oversized, and overpriced I might add, potted ferns to welcome any and all guests.  And the pressure is especially high since our home seems to be on the way to work or on the way home for most of the people we know and love.  Some even go out of their way to drive past our new home, so things that may seem insignificant... (to the husband) like a wreath, or a garden flag, or the welcome mat...are a big deal to me!

I even recieved a few custom orders for Christmas from people who drove by the house, saw something they loved, found me a Facebook, and messaged me to make that something for their loved ones.  See...that kinda pressure.  You get what I'm saying?!


So, with the wreath, I knew I wanted something white...crafty yet elegant...eye-catching but modest.  And after googling and pouring over Pinterest and finding something similar to this, I knew exactly what I had to do.  I was super excited with how this turned out...Hopefully you will be, too!


Thursday, September 27, 2012

A New Wreath for a New Season


Well first off...
HAPPY FALL Y'ALL!

We are beginning to transition into a new season here in small town Carolina and I am loving every single second of it.  The temperatures are dropping and my AC (and wallet) are LOVING it!  I know at every seasons start, I say,"This is my favorite..." but for fall, I really mean it!  

I mean, who doesn't love sweaters...

 and boots...

and campfires...

and pumpkins...

and apples...

and cider...

and hayrides...

and boots... (oh, did I mention that already?!)...(i really like boots!)

Any who...back to the purpose of these boots....I mean this blog...

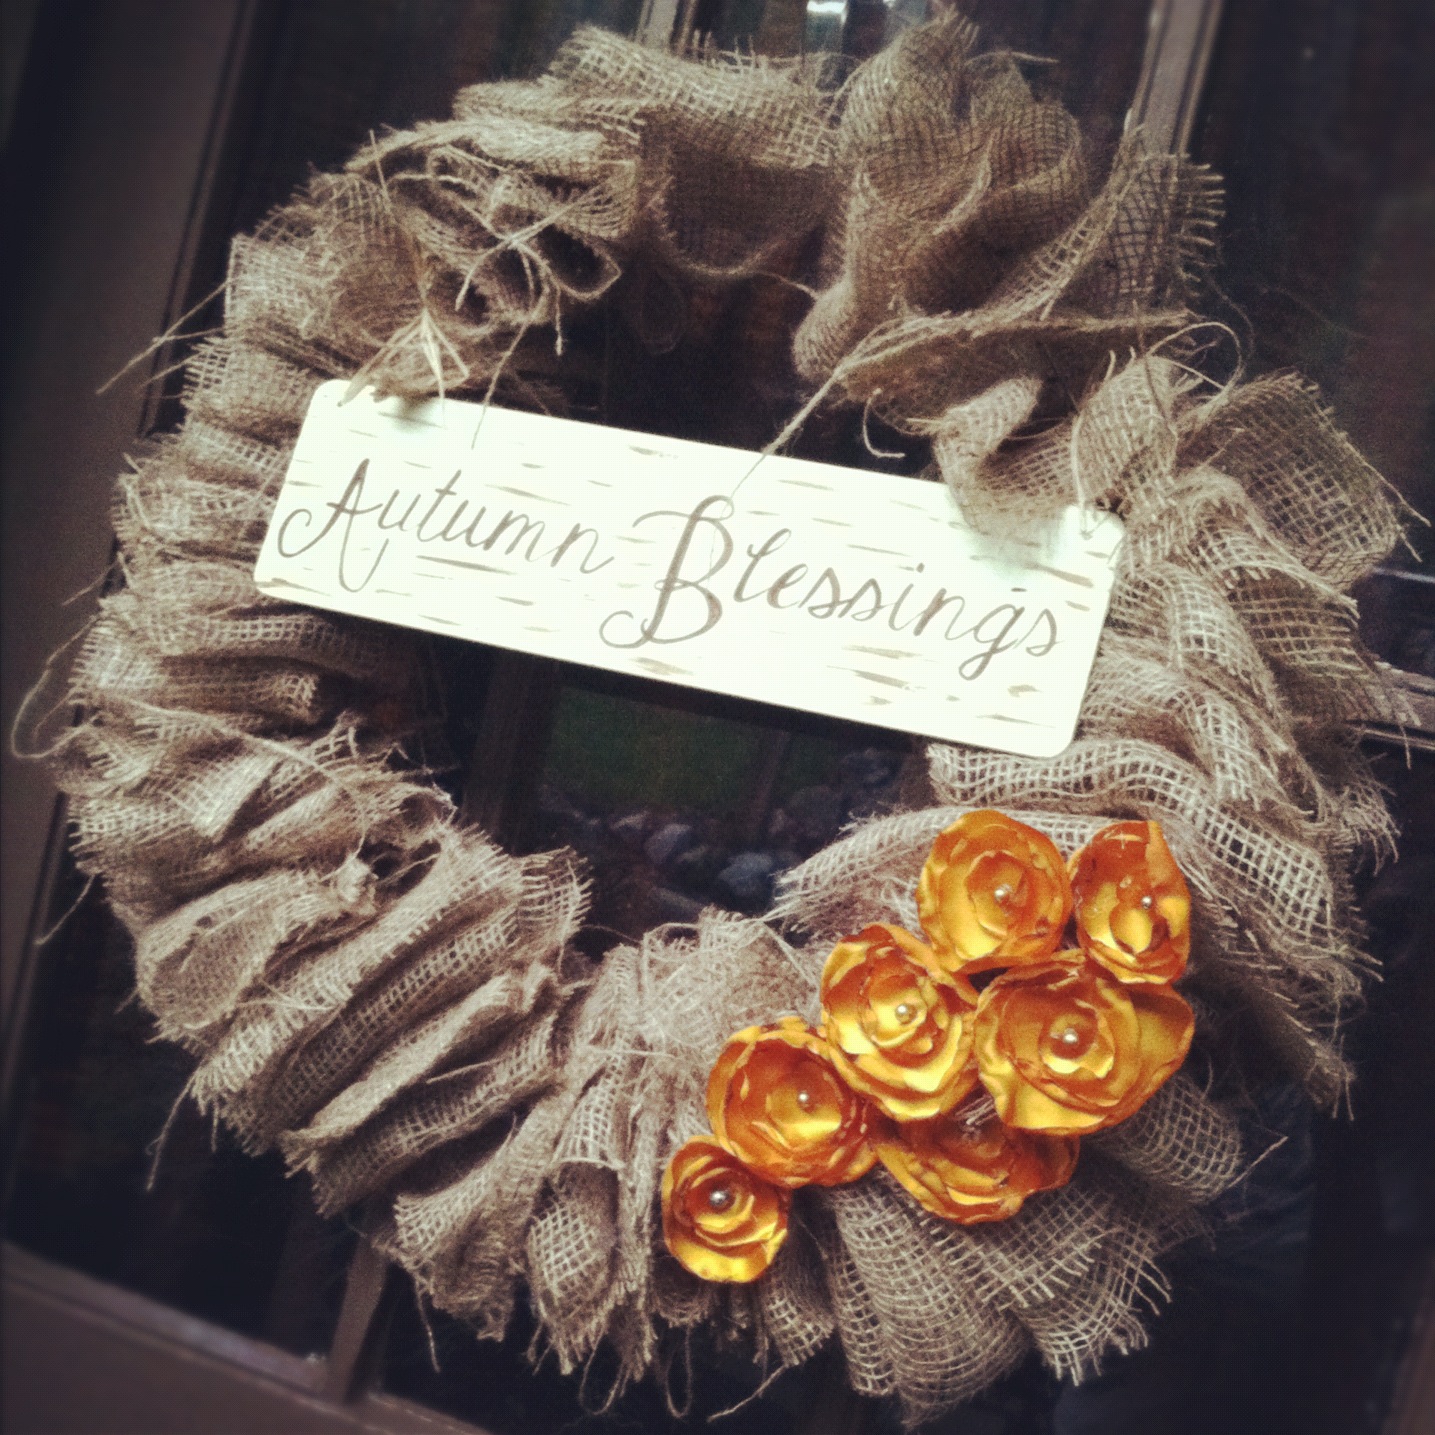
I couldn't pass up the Feed Sack Wreath for fall, it was made for welcoming autumn and all of her darling guests!  And I have had so many questions and comments on this one that I figured I would try to include a more detailed tutorial for making it.


...GATHER...
Well, first things first, gather together your supplies.  For this particular wreath, I used three burlap feed sacks, two wire clothes hangers, a cheap plack from WalMart, paint and brushes, some wire, some satin fabric, a few gold pearls, my hot glue gun, and glue sticks.


Flatten out your feed sack wreath.


Cut the top, side, and bottom edges off of your sack.  Only one side, the side where the seam is, or where the sack has been sewn together.   On the other side that has been "folded over," cut down the middle, leaving you two separate pieces of burlap.


Now cut your burlap into three (or 4 depending on the size you would like) strips.  This will actually be 6 (or 8) strips.


Here are all of my strips after cutting the three sacks.


Un-wrap your hangers.


Stretch them out, overlapping the ends about 6 to 8 inches in the middle. 


Wrap these together with some smaller wire.


Here is a close up...


And now you just started feeding your sack onto the stretched out hanger...accordion style.  Once you have fed all off your burlap onto the hanger, bring your two ends together and twist!


I have to apologize because I realized that I got so excited when painting my cheap little plack, that I forgot to take pictures.  Basically, I just painted over it in a linen white, waited for the paint to dry, and then painted Autumn Blessings in burnt umber.  I then brushed on a few lines to spruce it up a bit.  

And for the flowers, I didn't include instructions for them because of the gazillion tutorials already online that are fabulous!  Here's one, and another, and another...just to name a few...


And this tutorial wouldn't be complete without a picture of the 

organized 

chaos 

in my living room...


i spy with my little eye... Aren't Sunday afternoons fabulous?  While the hubs watches football, I like to do something productive...like make a mess of my living room!  And, being the multi-tasker that I am, there is usually two or more projects going at a time.  What else am I suppose to do while I wait for the paint to dry?


Now, tie or hot glue your signage in to place, hot glue your flowers onto your wreath and Ta- Dah!  I must mention that I just typed that so quickly...making it sound ever so simple.  This part took me more time than the entire project...and I don't believe I am exaggerating when I say that.  I placed that sign all over that wreath, slanted to the right, and then to the left, or maybe cockeyed at the bottom...or top.  I hope you get where I am going with this.  It had to be placed in just the right spot, is anybody with me?  And the flowers...well, that's a whole other story...

Funny thing is...they all ended up where I placed them the first time around...so sad and almost a waste of time.  Well, sort of.  Now I know, without a shadow of a doubt, that they are positioned where they look their best!


So, what do you think??

 May all your sweaters be cozy,  your boots be fashionable, your homes bearing fall's warming scents, and your front doors be dressed with autumns welcome...God bless you dear ones!


Funky Junk's Saturday Nite Special  PhotobucketIvy and Elephants DIY Show Off   The Girl Creative   My Uncommon Slice of Suburbia


Sunday, June 10, 2012

Burlap Feed Sack Wreath


I *LOVE* how this wreath turned out!  This was a special order for a friend of mine.  I am sad to admit that she requested this several months back, but I have good reasoning behind this project taking so long.  There has been a shortage of natural colored burlap in North AND South Carolina.  I know, I was appalled, too!  I believe every WalMart, Michael's, AC Moore, and Hobby Lobby within a 100 mile radius of my home town and within 100 miles of North Myrtle Beach, SC either cannot keep it on their shelves, has it on back order, or somebody is lazy and has not placed a re order.  So after searching high and low, I wandered into a Tractor Supply.  Lo and behold...BURLAP FEED SACKS!   Just know that this was one happy girl!!

I don't know that this is a complete tutorial...but it is pretty simple and I wanted to share it with you.  Besides, this is to purdy to keep to myself!!

All you need is some burlap, or in my case 5 burlap feed sacks, a clothes hanger, hot glue and a glue gun, and a few polyester satin flowers.  I didn't include the tutorial for the flowers because there are so many other wonderful ones out there...why reinvent the wheel, right?  One of my favorites is over are Jones Design Company.  Click on the name and it will take you right over.


Jones Design Company

Go ahead, click on over, I'll wait....

Just cut your burlap or sacks into strips, approximately 4 inches wide, and then the length of your burlap.  Straighten out a clothes hanger and begin to thread your burlap onto the hanger, like an accordion, sort of (In boxes 1 and 2 of the above photos).  Once you have threaded all of your burlap, space it out, putting dabs of hot glue onto the hanger to keep the burlap in place.  Then shape into a circle form (box 3), twisting the ends of the clothes hangers together.  I like to form a loop so that I can use that to hang my wreath.  Then glue your flowers into place (boxes 4 and 5) and hang on your wall or door (box 6).  

You know I have to include lots of pictures....


I can't help it....it just photographs beautifully!

I am thrilled with the way this one turned out.


  I know this one is taken, but I am definitely gonna have to make one of these for yours truly!
      I Heart Nap Time  Photobucket    


Monday, January 30, 2012

Gotta Love Those Felted Flowers


It's been quite a while since I posted a creation or tutorial.  I have been in some kind of a funk.  Cooking has brought me plenty of joy over this last month, but when it comes to creating, well, I've been a little slack.  I just haven't been feeling it...and I am pretty sure why... the craft room is a wreck.  I would take a picture and post it but I would be SO embarrassed!  Craft shows August through December and Christmas have completely wrecked any bit of sanity that may have been found in that room.  I keep putting it off, but I cannot any longer.  Starting this weekend...well or maybe next weekend...we'll just have to see!


ANYWAYS... a friend of mine needed to add a little sunshine to her front door... And this is what I came up with.  I think it turned out quite lovely and it was super easy.


This project included a wreath form, hot glue, a glue gun, and plenty of brightly colored sheets of felt.


 I cut the felt, rolled, and glued into flowers...all different sizes!


And cut, rolled, and glued a little more...


I thought this project turned out so cute...and bright...and fun!   The perfect splash of color to a dreary, rainy, cold January!


Sumo's Sweet Stuff