

Well first off...
HAPPY FALL Y'ALL!
We are beginning to transition into a new season here in small town Carolina and I am loving every single second of it. The temperatures are dropping and my AC (and wallet) are LOVING it! I know at every seasons start, I say,"This is my favorite..." but for fall, I really mean it!
I mean, who doesn't love sweaters...
and boots...
and campfires...
and pumpkins...
and apples...
and cider...
and hayrides...
and boots... (oh, did I mention that already?!)...(i really like boots!)
Any who...back to the purpose of these boots....I mean this blog...
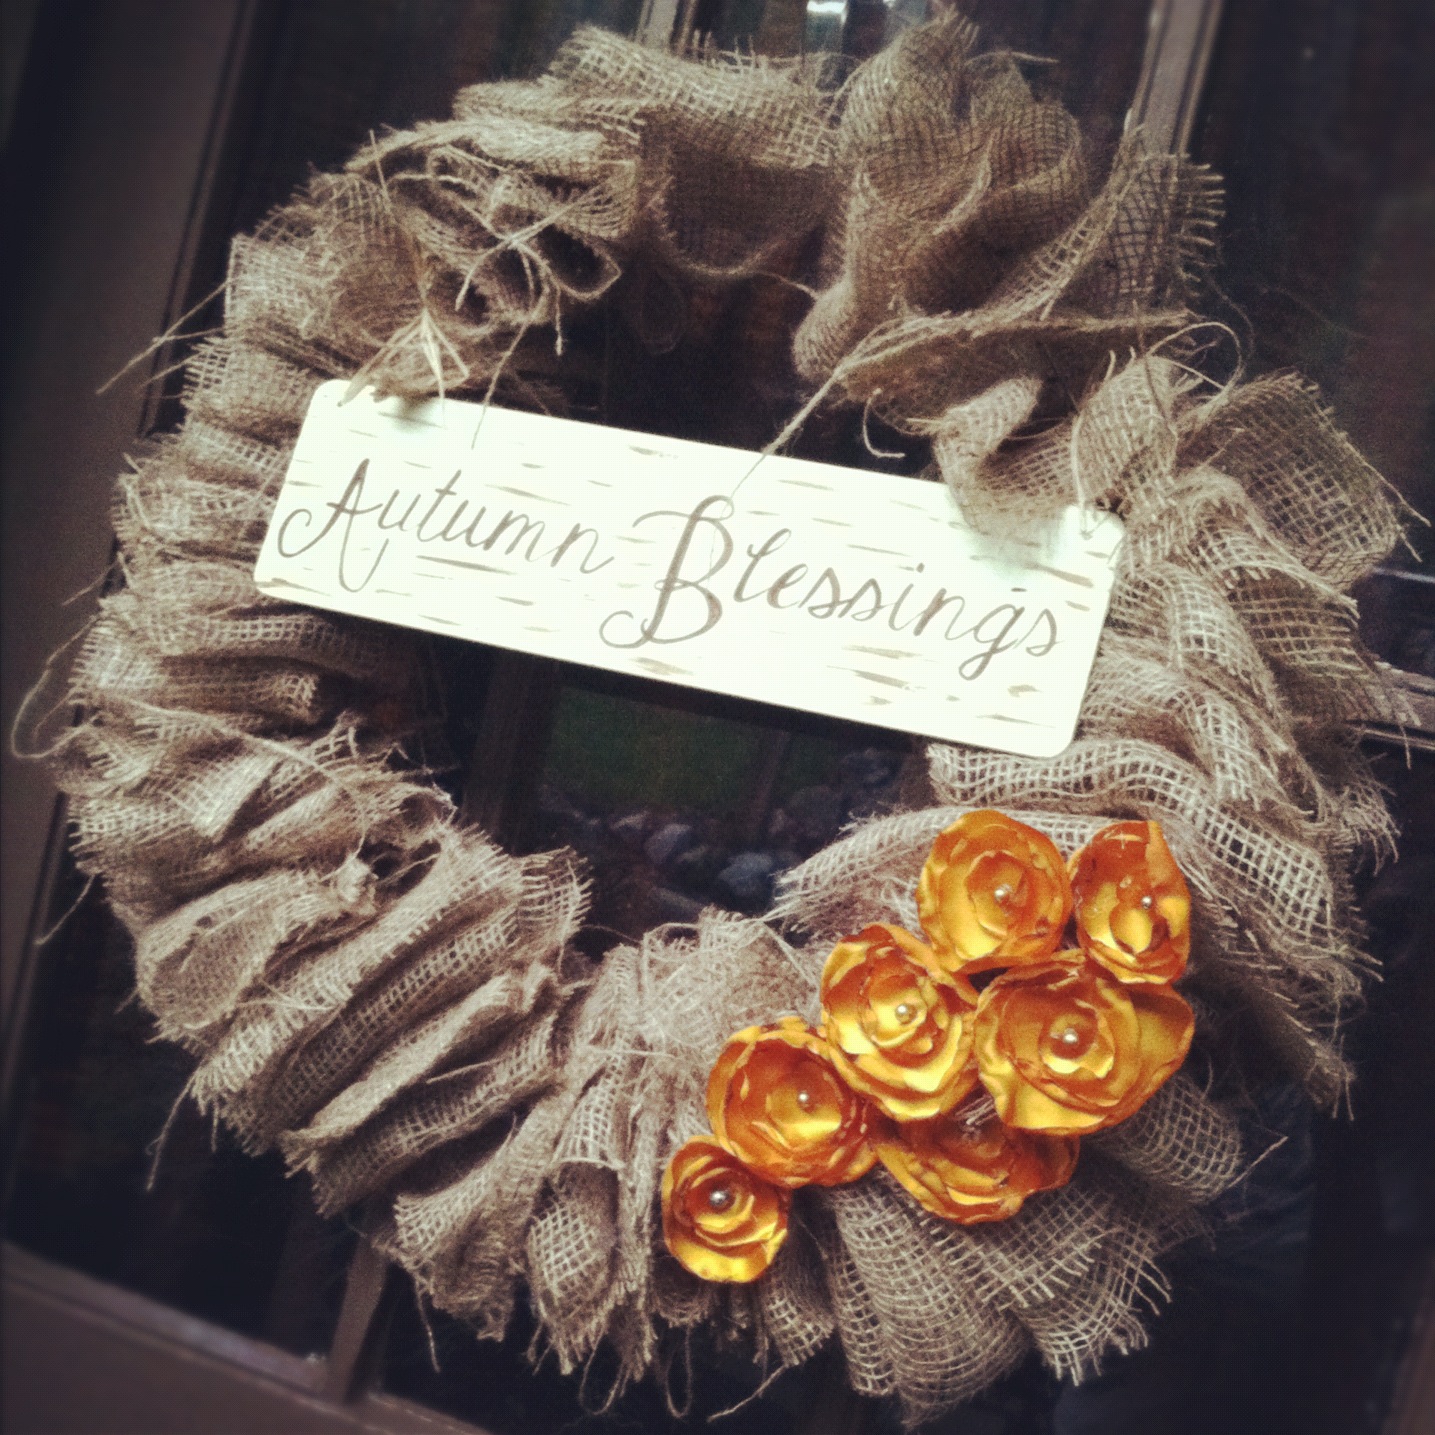
I couldn't pass up the Feed Sack Wreath for fall, it was made for welcoming autumn and all of her darling guests! And I have had so many questions and comments on this one that I figured I would try to include a more detailed tutorial for making it.

...GATHER...
Well, first things first, gather together your supplies. For this particular wreath, I used three burlap feed sacks, two wire clothes hangers, a cheap plack from WalMart, paint and brushes, some wire, some satin fabric, a few gold pearls, my hot glue gun, and glue sticks.

Flatten out your feed sack wreath.

Cut the top, side, and bottom edges off of your sack. Only one side, the side where the seam is, or where the sack has been sewn together. On the other side that has been "folded over," cut down the middle, leaving you two separate pieces of burlap.

Now cut your burlap into three (or 4 depending on the size you would like) strips. This will actually be 6 (or 8) strips.

Here are all of my strips after cutting the three sacks.

Un-wrap your hangers.

Stretch them out, overlapping the ends about 6 to 8 inches in the middle.

Wrap these together with some smaller wire.

Here is a close up...

And now you just started feeding your sack onto the stretched out hanger...accordion style. Once you have fed all off your burlap onto the hanger, bring your two ends together and twist!
I have to apologize because I realized that I got so excited when painting my cheap little plack, that I forgot to take pictures. Basically, I just painted over it in a linen white, waited for the paint to dry, and then painted Autumn Blessings in burnt umber. I then brushed on a few lines to spruce it up a bit.
And for the flowers, I didn't include instructions for them because of the gazillion tutorials already online that are fabulous! Here's one, and another, and another...just to name a few...
And this tutorial wouldn't be complete without a picture of the
organized
chaos
in my living room...

i spy with my little eye... Aren't Sunday afternoons fabulous? While the hubs watches football, I like to do something productive...like make a mess of my living room! And, being the multi-tasker that I am, there is usually two or more projects going at a time. What else am I suppose to do while I wait for the paint to dry?

Now, tie or hot glue your signage in to place, hot glue your flowers onto your wreath and Ta- Dah! I must mention that I just typed that so quickly...making it sound ever so simple. This part took me more time than the entire project...and I don't believe I am exaggerating when I say that. I placed that sign all over that wreath, slanted to the right, and then to the left, or maybe cockeyed at the bottom...or top. I hope you get where I am going with this. It had to be placed in just the right spot, is anybody with me? And the flowers...well, that's a whole other story...
Funny thing is...they all ended up where I placed them the first time around...so sad and almost a waste of time. Well, sort of. Now I know, without a shadow of a doubt, that they are positioned where they look their best!


So, what do you think??

May all your sweaters be cozy, your boots be fashionable, your homes bearing fall's warming scents, and your front doors be dressed with autumns welcome...God bless you dear ones!


This is better than any wreath I have seen in any store. It is just wonderful. This is such an awesome post. I would love it if you would share this post at our WIW linky party. Hope you can join us. :-)
ReplyDeletePaula
ivyandelephants.blogspot.com
Thanks for sharing your Fall wreath with us at my NIFTY THRIFTY TUESDAY party...luv that sign and flowers.
ReplyDeleteBlessings,
Linda